
What You'll Need
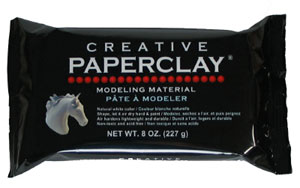 Creative Paperclay
Wood pieces for base
Styrofoam ball or aluminum foil ball
Non-stick craft pad or wax paper taped to work surface to prevent clay sticking
Cup of water for sculpting
Sharp pottery tool or toothpicks (not pictured)
Acrylic paint, paint pens, sharpie markers, etc. (not pictured)

What To Do
1. Take your styrofoam ball and cover with paperclay. Use dabs of water to smooth the clay over the styrofoam (or aluminum foil ball.) Place the ball on top of your base. Add paperclay to both the base and the ball to adhere the two pieces together. Smooth and blend the paperclay into the base of the ball and toward the bottom of your wood piece. Creative Paperclay adheres remarkably well to wood. Feel free to cover the entire wood base with clay, or not...but do cover enough of the base to stick little paperclay arms to it!

2. This is a good time to press eye sockets into your doll's face. Set aside.
3. Now it's time to make the arms. Take a ball of paperclay, roll it into a snake. Fold the snake in half and cut at the crease. Hold these little snakes up to your doll to make sure they are the right length for arms.


4. Smooth the edges of your little arms. Pinch one end of each arm slightly, and round the other end. The pinched end will be your doll's hands, the rounded will be your doll's shoulders.

5. Attach the arms to your doll's body with a dab of water. Creative Paperclay adheres to itself really well, but you may need to blend the shoulders in just a bit.


6. Now it's time to give your doll it's features! This is my favorite part of the sculpt! If you haven't already, press your thumbs into the head for eye sockets and eyebrow ridges. Take a tiny bit of paperclay and make a pinch nose. Add a leaf-shaped lump of clay below the nose to sculpt lips.


7. I typically set the doll aside at this point and allow it to dry a bit. This makes adding hair and other features easier and prevents you from messing up the parts you have already sculpted. Set the doll aside for a few hours in a warm, dry place and it'll be ready for hair!
8. Make anywhere from 4-10 tear-shaped paperclay pieces. Blend these pieces into your doll's head one at a time. I used four on this doll's head. Feel free to add as many as you like! I find 10 teardrops works well for bigger hair!


9. Now take your toothpick or sharp tool and draw lines in the clay in the direction or style you want your doll's hair to be!


10. Allow your doll to dry for at least 24 hours in a warm, dry place. Once dry, get out your paints and have a blast! I typically sew or glue fabric to my dolls for clothing and accessories. I haven't had a chance to do that with this doll yet, but check back here soon for updated pics of my wooden base doll and a tutorial on how to dress her!!!

Hope you enjoyed this tutorial! Please be sure to visit the Creative Paperclay Website: http://creativepaperclay.com/
Want more ideas on how to use Creative Paperclay? Visit the Creative Paperclay Blog:


