
Very Simple Creative Paperclay® Ornaments
Ever really want to create something but your time is greatly limited? Welcome to my life! Ha! When life gets busy, it's time for me to get really creative and figure out how to make simple project which take up little time but are oh so fulfilling. Here's an ornament project that is so simple, even the kiddies can get involved!
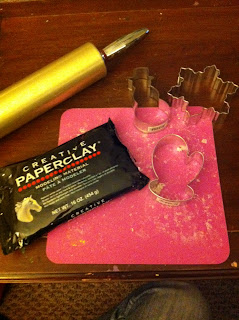


What You'll Need
Creative Paperclay®
Rolling Pin
Non-stick craft mat or wax paper taped on work surface (to prevent sticking)
Cookie Cutters (I used cutters shaped like mittens)
Toothpick (not pictured)
Colored Pencils and/or crayons (not pictured)
Sharpie Markers or any magic markers you have (not pictured)

What To Do
1. Roll out a good-sized lump of Creative Paperclay® to a 1/4" thick on your non-stick craft mat.

2. Take your cookie cutters and press into the Creative Paperclay®.


3. Remove excess Creative Paperclay® from your cut-outs. Make a hole for a ribbon or string with the toothpick.


4. Carefully pick your cut-outs up and place them on a baking sheet. Bake in a toaster oven or full-size oven at 220 degrees for 10-12 minutes. Flip over and bake for another 6-8 minutes. Cut-outs should be hardened, but may be a little bit pliable.
5. Decorate with Sharpie Markers, colored pencils, crayons, paints, glitter, beads...whatever your heart desire! Enjoy the fruits of your labors!!!


No comments:
Post a Comment