Showing posts with label creative paperclay. Show all posts

Wednesday, October 5, 2011

Creative Paperclay Wooden Base Art Doll

Have you gone to a flea market, yard sale, or craft store and purchased items which you had no immediate use for, but knew you just had to have said item? I am certainly guilty of this habit, but I love buying these items and storing them in my craft "pile." When an idea hits, bam! I've got those random items that I need! So this project is based on some wooden pieces I had purchased a while back at a flea market. They are unfinished table chair/table leg ends. Feel free to use unfinished wood candle holders, blocks, boxes, etc.

What You'll Need
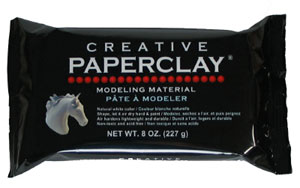
Creative Paperclay
Wood pieces for base
Styrofoam ball or aluminum foil ball
Non-stick craft pad or wax paper taped to work surface to prevent clay sticking
Cup of water for sculpting
Sharp pottery tool or toothpicks (not pictured)
Acrylic paint, paint pens, sharpie markers, etc. (not pictured)


What To Do
1.  Take your styrofoam ball and cover with paperclay. Use dabs of water to smooth the clay over the styrofoam (or aluminum foil ball.) Place the ball on top of your base. Add paperclay to both the base and the ball to adhere the two pieces together. Smooth and blend the paperclay into the base of the ball and toward the bottom of your wood piece. Creative Paperclay adheres remarkably well to wood. Feel free to cover the entire wood base with clay, or not...but do cover enough of the base to stick little paperclay arms to it!


2.  This is a good time to press eye sockets into your doll's face. Set aside.

3.  Now it's time to make the arms. Take a ball of paperclay, roll it into a snake. Fold the snake in half and cut at the crease. Hold these little snakes up to your doll to make sure they are the right length for arms. 


4.  Smooth the edges of your little arms. Pinch one end of each arm slightly, and round the other end. The pinched end will be your doll's hands, the rounded will be your doll's shoulders.


5.  Attach the arms to your doll's body with a dab of water. Creative Paperclay adheres to itself really well, but you may need to blend the shoulders in just a bit.


6. Now it's time to give your doll it's features! This is my favorite part of the sculpt! If you haven't already, press your thumbs into the head for eye sockets and eyebrow ridges. Take a tiny bit of paperclay and make a pinch nose. Add a leaf-shaped lump of clay below the nose to sculpt lips.


7.  I typically set the doll aside at this point and allow it to dry a bit. This makes adding hair and other features easier and prevents you from messing up the parts you have already sculpted. Set the doll aside for a few hours in a warm, dry place and it'll be ready for hair!

8. Make anywhere from 4-10 tear-shaped paperclay pieces. Blend these pieces into your doll's head one at a time. I used four on this doll's head. Feel free to add as many as you like! I find 10 teardrops works well for bigger hair!


  9.  Now take your toothpick or sharp tool and draw lines in the clay in the direction or style you want your doll's hair to be!


10. Allow your doll to dry for at least 24 hours in a warm, dry place. Once dry, get out your paints and have a blast! I typically sew or glue fabric to my dolls for clothing and accessories. I haven't had a chance to do that with this doll yet, but check back here soon for updated pics of my wooden base doll and a tutorial on how to dress her!!!


Hope you enjoyed this tutorial! Please be sure to visit the Creative Paperclay Website:  http://creativepaperclay.com/

Want more ideas on how to use Creative Paperclay? Visit the Creative Paperclay Blog:


Sunday, July 24, 2011

Bookmark For Your Summer Novel

So I'm on vacation this weekend. Of course, I must pack a small craft bag. As we are camping, I really have to taper my craft bag down to a few items. So, I brought a couple of pre-made, unfinished Paperclay bookmarks, a cheap Daler Rowney acrylic paint kit, some paint brushes, and a package of Delight (just in case I feel like sculpting a bit!) But tonight, it was all about painting those bookmarks. I find it is always good to have ready-made crafts on hand for quick and easy project fun!


What You Need: 
Creative Paperclay
Rolling pin
Non-stick craft mat or wax paper
Butter knife
Straight edge or ruler
Toothpick
Acrylic paint
String, thread, or embroidery thread
Beads (optional)

Camping Craft Kit


What To Do:
1. Roll out a clump of paperclay really thin to 1/16th of an inch. Make sure you do this on the non-stick craft mat or wax paper.

2. Cut out bookmarks with the butter knife by guiding it along the straightedge (or ruler). Or have a blast with some cookie cutters! Make sure you take the toothpick and make a whole big enough for your string to fit through. Also, make sure the whole is not close to the edge as this may promote breakage.

3. You can try baking your cut-outs at 230 degrees for up to 5 minutes. I have found that allowing them to air dry for a 3 hours, placing them under a heavy book over night, and then allowing them to dry for a few more hours in the morning is best for a really flat bookmarks. This is why I make several at a time and keep them on hand. Patience is not a virtue I have a lot of!

4.  Once dry, go ahead and paint to your heart's content!

Put Down That Flyer From The Camping Office and Be Messy!!!
5.  Once the paint is dry, run your string, thread, embroidery thread through the whole. Add a bead to the end if you wish! And now you have yourself a lovely, paperclay bookmark for your summer reading books!


Or You Can Put Your Bookmark in Your Latest Edition of Art Doll  Quarterly

Love Summer Reading!!!

Friday, June 10, 2011

Make Your Own Stamp Magnets With Creative Paperclay!

This is a very fun rainy day project for the whole family!
What You'll Need
Creative Paperclay
Rolling pin
Non-stick craft mat or wax paper
Assorted stamps
Sharp pottery tool or butter knife 
Acrylic paint
Paint brushes
Small cup of water for sculpting and paintbrush washing
Paper towel
Strong glue
Magnets

What To Do
1. Roll out a lump of paperclay to 1/4-1/2 inches thick.


2. Lift the paperclay off of the craft mat to ensure that it is not sticking anywhere.
3.  Press your favorite stamps into the paperclay.

4.  Remove stamps to reveal impressions in the paperclay.

5.  Take sharp pottery tool or butter knife and cut around impressions. I prefer straight lines, but feel free to go with curves and circular shapes as well.

6.  Smooth edges with a bit of water.
7.  Bake in toaster oven at 220 degrees for 10 minutes, flip over and bake for another 10 minutes. You can also let the pieces dry overnight.
8.  Once dry, paint to your liking!!!
9.  One the paint dries, glue magnets (small round ones are best) to the back. Allow glue to dry.
10. Stick your new magnets onto your fridge or filing cabinet and enjoy those rainy day memories!!!

Saturday, May 14, 2011

A Discussion About Losing My Mind & Creative Paperclay Project - Light Switch Cover Girl

Do you ever feel that your head is simply not screwed on straight? I feel like that a lot lately. But I am happy to report that I finished my final class at Fitchburg State University yesterday!!! Graduation is next week and then preparation for the nurse licensing exam (NCLEX) will ensue. I'm almost a nurse!!! But back to this loose-head phenomenon. My mind likes to play tricks on me lately. I am typically on top of things...I know my schedule, I am aware of my deadlines, I am a very responsible person. Lately, I can't keep track of things, the deadlines I have in my head are dead wrong, and I look like a rather irresponsible person. Perhaps graduating from nursing school will give me my mind back. That would be nice. So here is my latest project...LATE being the operative word as I completely blasted through a midnight deadline to get this blogpost up and running on http://creativepaperclay.blogspot.com/. My apologies to Terri and the Creative Paperclay DT. So twelve and a half hours late, here it is! Happy Saturday Everyone!


There is no need for your light switch covers to be boring anymore! Here's what you'll need for this project:

Light Switch Cover

Creative Paperclay

Gesso

Rolling pin

Non-stick craft pad or wax paper to roll out paperclay

Craft knife or butter knife

Pencil

Acrylic Paint, Paint Pens

Decoupage Glue or Glue that Dries Clear Diluted With Water

Interior Varnish

Plastic bag to keep screws in.

What to Do:

1.  Paint light cover with 2-3 very thin layers of gesso. Allow to dry. Be careful to maintain open holes for screws in the light cover.

2.  Roll out a lump of paperclay to a very thin layer - about 1/16th of an inch. Make sure that enough paperclay is rolled out to cover light switch cover.

3.  Cover light switch cover with paperclay, cut around the edges, poke out the screw holes, and the actual switch area. Smooth paperclay around edges of light switch cover but do not allow paperclay to go over the edge of the cover. This will prevent the cover from fitting flush on the wall.

4.  Let your paperclay base dry.

5. Once dry, pull gently on the paperclay or bend the light cover slightly. If the paperclay base comes up from the light cover, remove it and apply decoupage or white glue full strength. If the base does not come up, proceed with project.

6.  Roll a small ball and a long, thin snake out of paperclay. The ball will become the Light Switch Cover Girl's head, the snakes will become her arms and legs.

7. With your pencil, lightly draw your girl onto the light switch cover. No need for details of the face, just a round shape where her head will go, a neck (around the top screw hole), her dress (or if you want to make a boy, his suit). Leave room for the face, arms, and head to be built onto the clay base and protrude.

8.  Take the small ball, flatten it a bit and work in into the paperclay base with a bit of water. Add facial features like a small nose, some lips, and hair if you wish.

9. Cut two small arms and work them into the clay base with some water. I like to put my girl's hands on her hips, but feel free to build your arms however you wish.

10. Cut two small legs...add these to your clay base. Always be sure to stay on the flat part of the light switch cover. Otherwise, your cover may not fit flush on the wall.

11. Allow your newly built girl (or boy) to dry. Once dry, paint to your girl to your liking. Finish with varnish, make sure the edges get a bit of this coating. Add a second coat once dry.

12. And now you have your own Light Switch Cover Girl! Imagine the possibilities! How many light switches do you have? Great for gifts as well!

Thanks for reading!

Saturday, April 16, 2011

Really Simple Creative Paperclay Project - Make Your Own Bookmarks!!!


What You'll Need
Creative Paperclay
Small cup of warm water
Non-stick craft mat
Acrylic Paint
Embroidery Thread
Straight edge-knife or cutter
Rolling pin
Pencil

What To Do
1.  Break off a clump of paperclay.

2. On your craft mat, roll out a very, very thin layer of paperclay - about a 1/16th of an inch.

3.  Cut out a long rectangle. You can make several book marks at once, so feel free to cut out several rectangles. Actually, feel free to cut out as many shapes as you wish. Why not have unique bookmarks!

4. Remove excess paperclay and place back into airtight bag/container.

5.  With the pencil tip, create a hole in each shape large enough from some embroidery thread.

6. Allow to drive overnight. You may even place a sheet of wax paper over the pieces and place a heavy book on top. Keep in mind that this may crease or wrinkle the clay, so if you want a flat surface, make sure the wax paper is very smooth.

7. Once dry, draw a design of your choosing lightly with the pencil. Draw designs on both sides!

8. Paint the bookmarks to your liking.

9. Once dry, add embroidery thread that compliments your design, three or four strands should do. Make the strands as long as you wish. Tie the strands, braid the strands, twist the strands and voila! You have just made a Creative Paperclay bookmark!